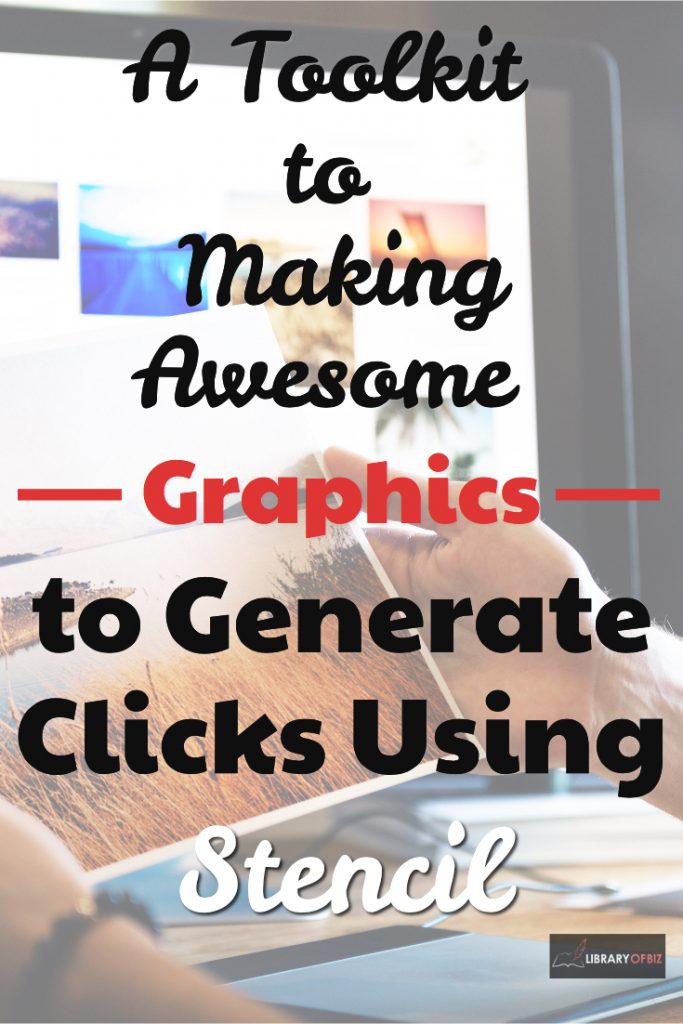
A Toolkit to Making Awesome Graphics to Generate Clicks Using Stencil
How do I make great images people want to click? This was one of my biggest questions when I first started blogging. I had absolutely no idea and the graphics I was creating were pretty terrible.
What I did know was:
- I am not a wizard photoshop user.
- Most of my images look like my five year old created them.
- There has to be a better/easier way.
We found a program called Stencil. Stencil has made our graphics issue non existent. The good part is the price starts at… wait for it… FREE. The hobbyist package is actually FREE. We use Stencil for our consulting business as well as our blog. We have businesses we create graphics for to share on social media as well as the graphics we use on our blog. Stencil has made this process smooth and easy.
Whats the con?
The only con we have found to using the product is that like any new product, it takes time to learn. In the beginning it took me around 30 to 45 minutes create each image. After a week of using the product, the amount of time began to dwindle. It now takes me around 3 to 10 minutes to create an image depending on how long I search for the perfect picture.
Tip Time: How did I decrease this time?
The way I decreased the time it takes to create the image has been by creating templates. Stencil is awesome in that you save your work within the site. A user can go back to an old image, change the picture and the text to fit their needs, and they are ready to publish!
You want your images to be recognizable to your brand. You keep all of your graphics in the same realm. Why? Because people will begin to recognize your pictures instantaneously and click. Thats what you want!
Today I am going to share with you how I use Stencil everyday to make my graphics!
1. First I start with a fresh screen and I choose my image size depending on what I will use it for. Stencil is GREAT in that it has canned options for social media posts such as Pinterest, Facebook, Twitter, etc.
 2. The next thing I do is add my logo to the image.
3. After I have added my logo, I search my templates. Maybe you don’t have any templates and aren’t sure where to start. Thats ok! Stencil has a selection to get you started!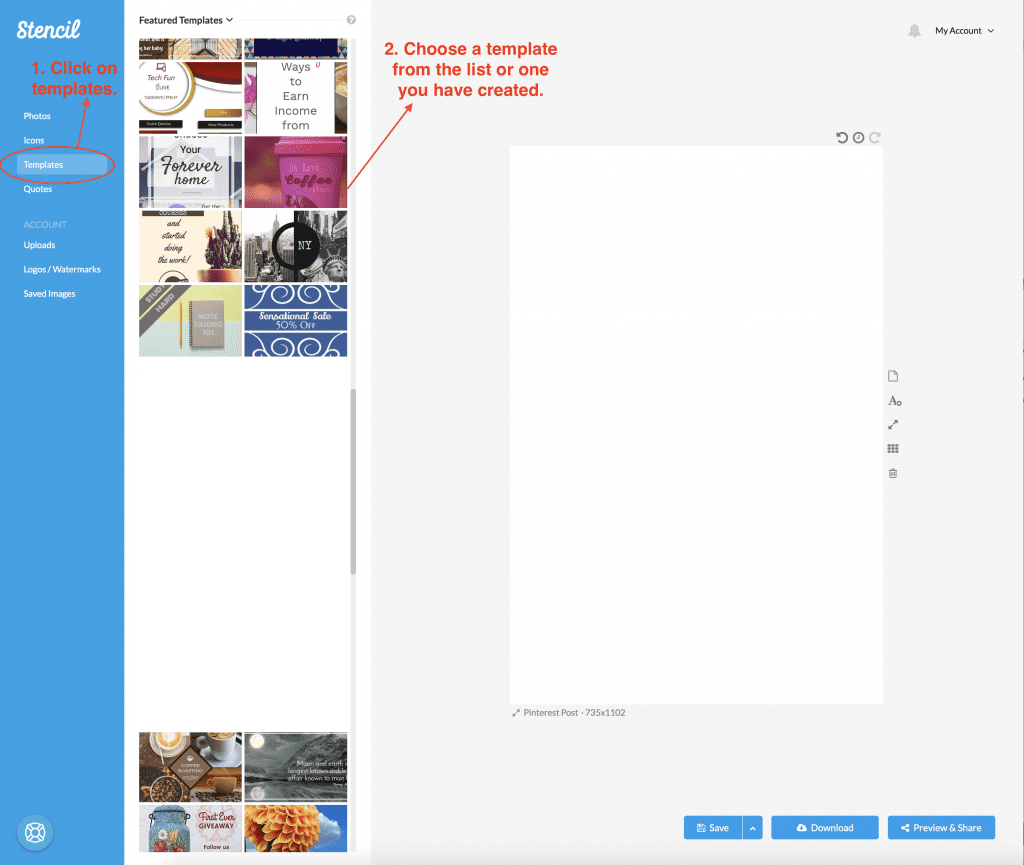
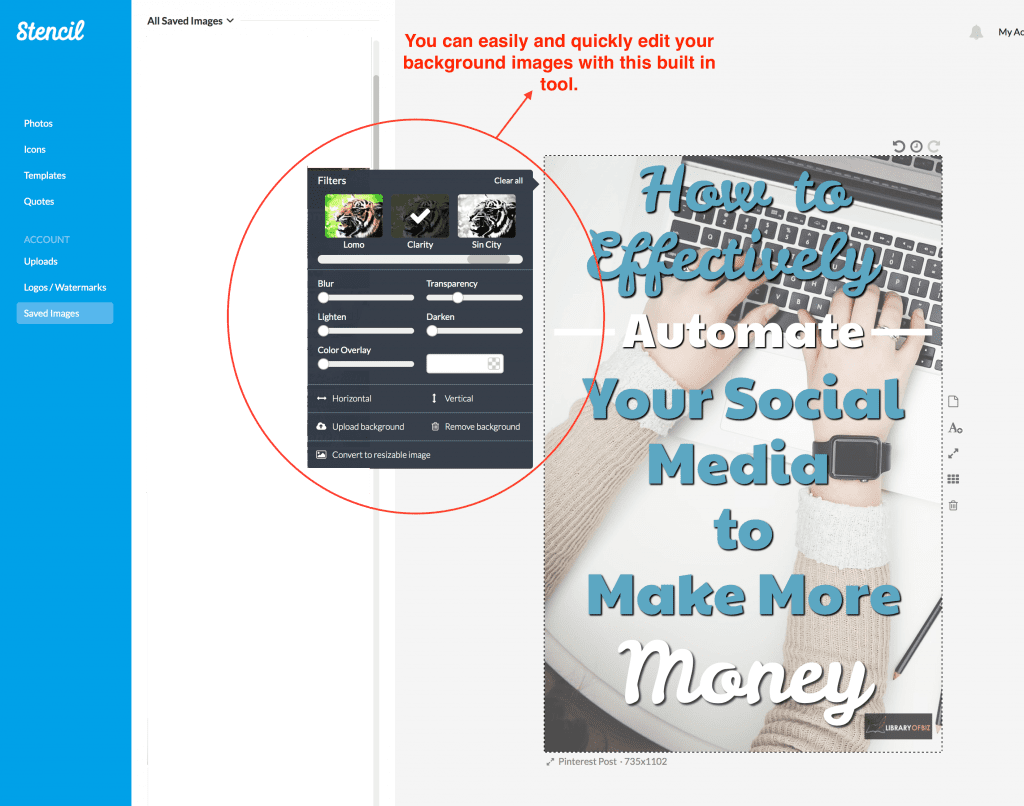
4. I selected from my templates I have used before. Once I select a template, I change the background picture.
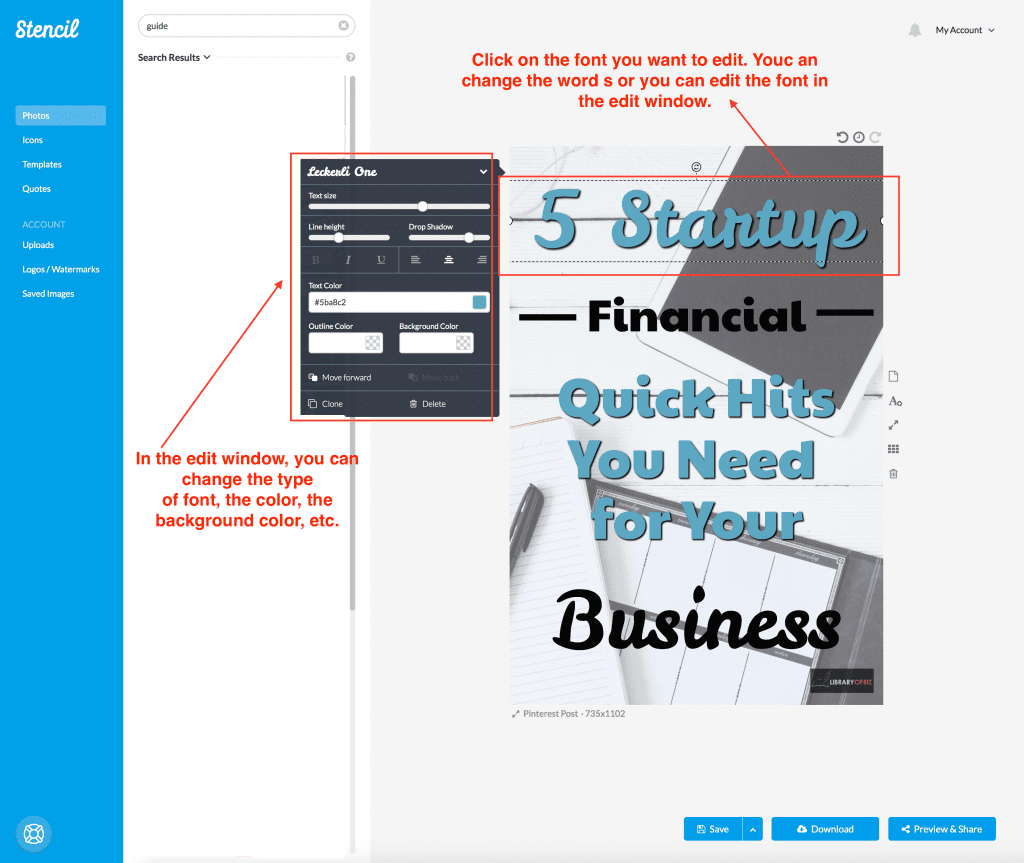
5. Next I begin to change my text. It is best practice to use between two and three different contrasting fonts (ex. fat and skinny). You never want to use more than three types of fonts.
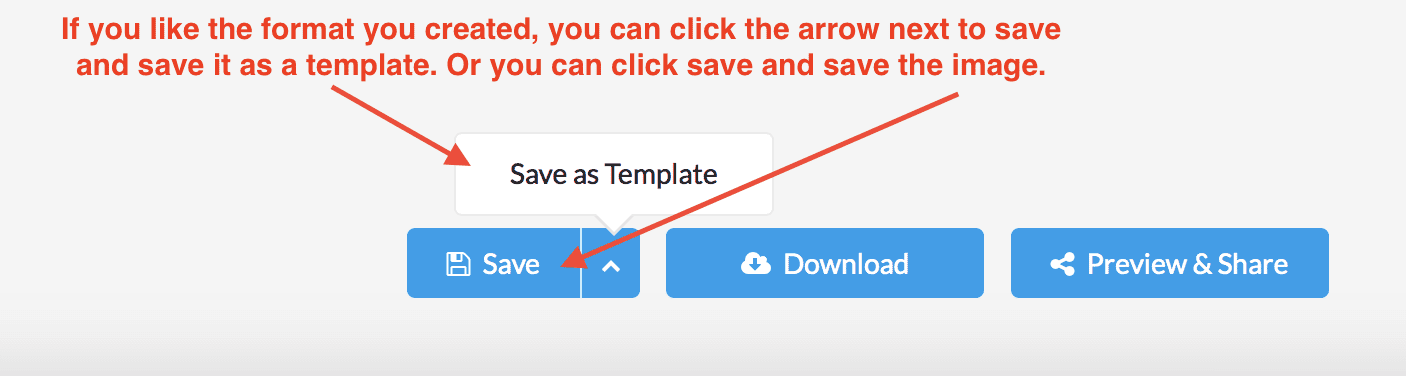
6. Make any extra tweaks you may need. Then save your image and/or save your template if you really like it!
Thats the play by play on how we create our images! Go over to Stencil and sign up to get going on creating your own graphics easily and quickly! This is a product you definitely need to help save time and make quality graphics!
Check out how Tailwind has helped us effectively automate our social media to make more money in the below post! Then head over to Tailwind and schedule your pins with the images you created.
